

Hello :)
As promised I have a Mixed media card tutorial for you today :)
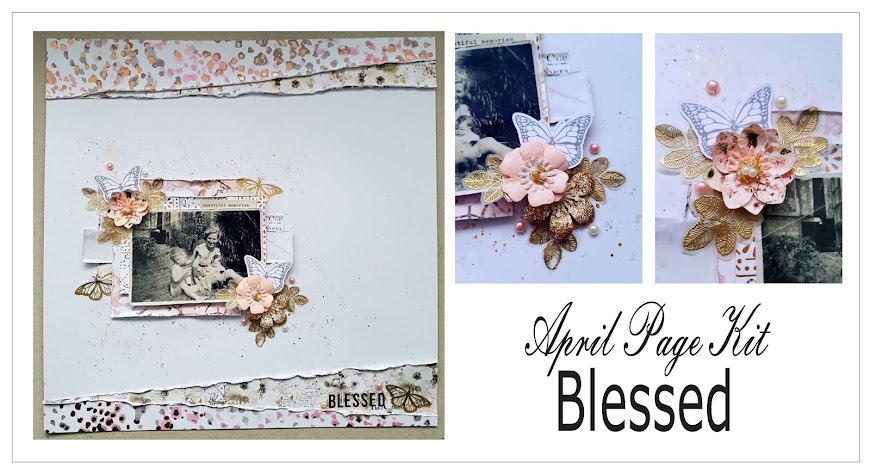
The card was made using this months Colour Inspiration Pom Pom.

Here's what you will need :
Card blank (any size)
Cardstock cut slightly smaller than your card blank
Cardstock die cuts (I used butterflies and flourishes both Tim Holtz dies)
Modelling paste
Stencil
Cheesecloth
Ink or paint (I used Dylusions Ink Sprays)
Heat tool (optional)
Embellishments ( I used a paper rose, chiffon ribbon, die cut flourish, punched leaves and butterflies, crystal pins, flat back gems and a little more cheesecloth)
Stickles or glitter glue
Adhesives (PVA or matt medium)

1. Adhere cardstock die cuts to the cardstock along with some cheesecloth.
Allow to dry or dry with heat tool.

2. Once dry add modelling paste through a stencil randomly over the piece.
Allow to dry or dry with a heat tool.

You are aiming to get lots of texture so don't be too perfect!

3. Using your chosen inks add colour to the piece. I choose just two colours from the Dylusions range.
Blend the colours using water and dab off any excess with kitchen towel. When you are happy with the colour allow to dry or dry with a heat tool.
I have a video HERE which shows how I add my inks.


4. Adhere the piece to your card blank.
Add your embellishment cluster to the piece. I tied two bows with chiffon ribbon, added the rose to the centre of the bow then added some cheesecloth, punched leaves, pins and flourish.

I added 3 small punched butterflies to the left side of the card, finishing them off with a small flat back gem.

Finish off the card with a touch of Stickles around the edges, on the rose and butterflies.

Please feel free to share this post on Pinterest etc.
If you would like to share your completed card please leave a link in a comment and I'll stop by.
Thank-you for stopping by
Have Fun!
Michele :)
No comments:
Post a Comment